No Server? Your Desktop Is the Server
Where your data lives is a fork in the road when you pick a tool. SaaS is the convenient path: sign up and go, nothing to maintain, at the cost of your data sitting on the provider's servers. UnDercontrol will offer that hosted option too. But if what you want is full data self-custody — tasks, notes, and ledgers stored only on your own devices, where backup means copying a file and migration means moving to another machine — this tutorial is for you.
Self-custody usually means running your own server, and that is exactly where most people give up. Here is a zero-cost path that skips the server entirely: the UnDercontrol desktop app ships with a full backend and keeps your data in a SQLite file on your own disk; Cloudflare Tunnel exposes that machine to the internet for free; the iOS app connects straight to your own endpoint. Check tasks, jot notes, and log expenses from the subway, while the data itself never lives anywhere but your computer. No public IP, no router port forwarding, and no domain to buy (optional, only if you want a fixed address).
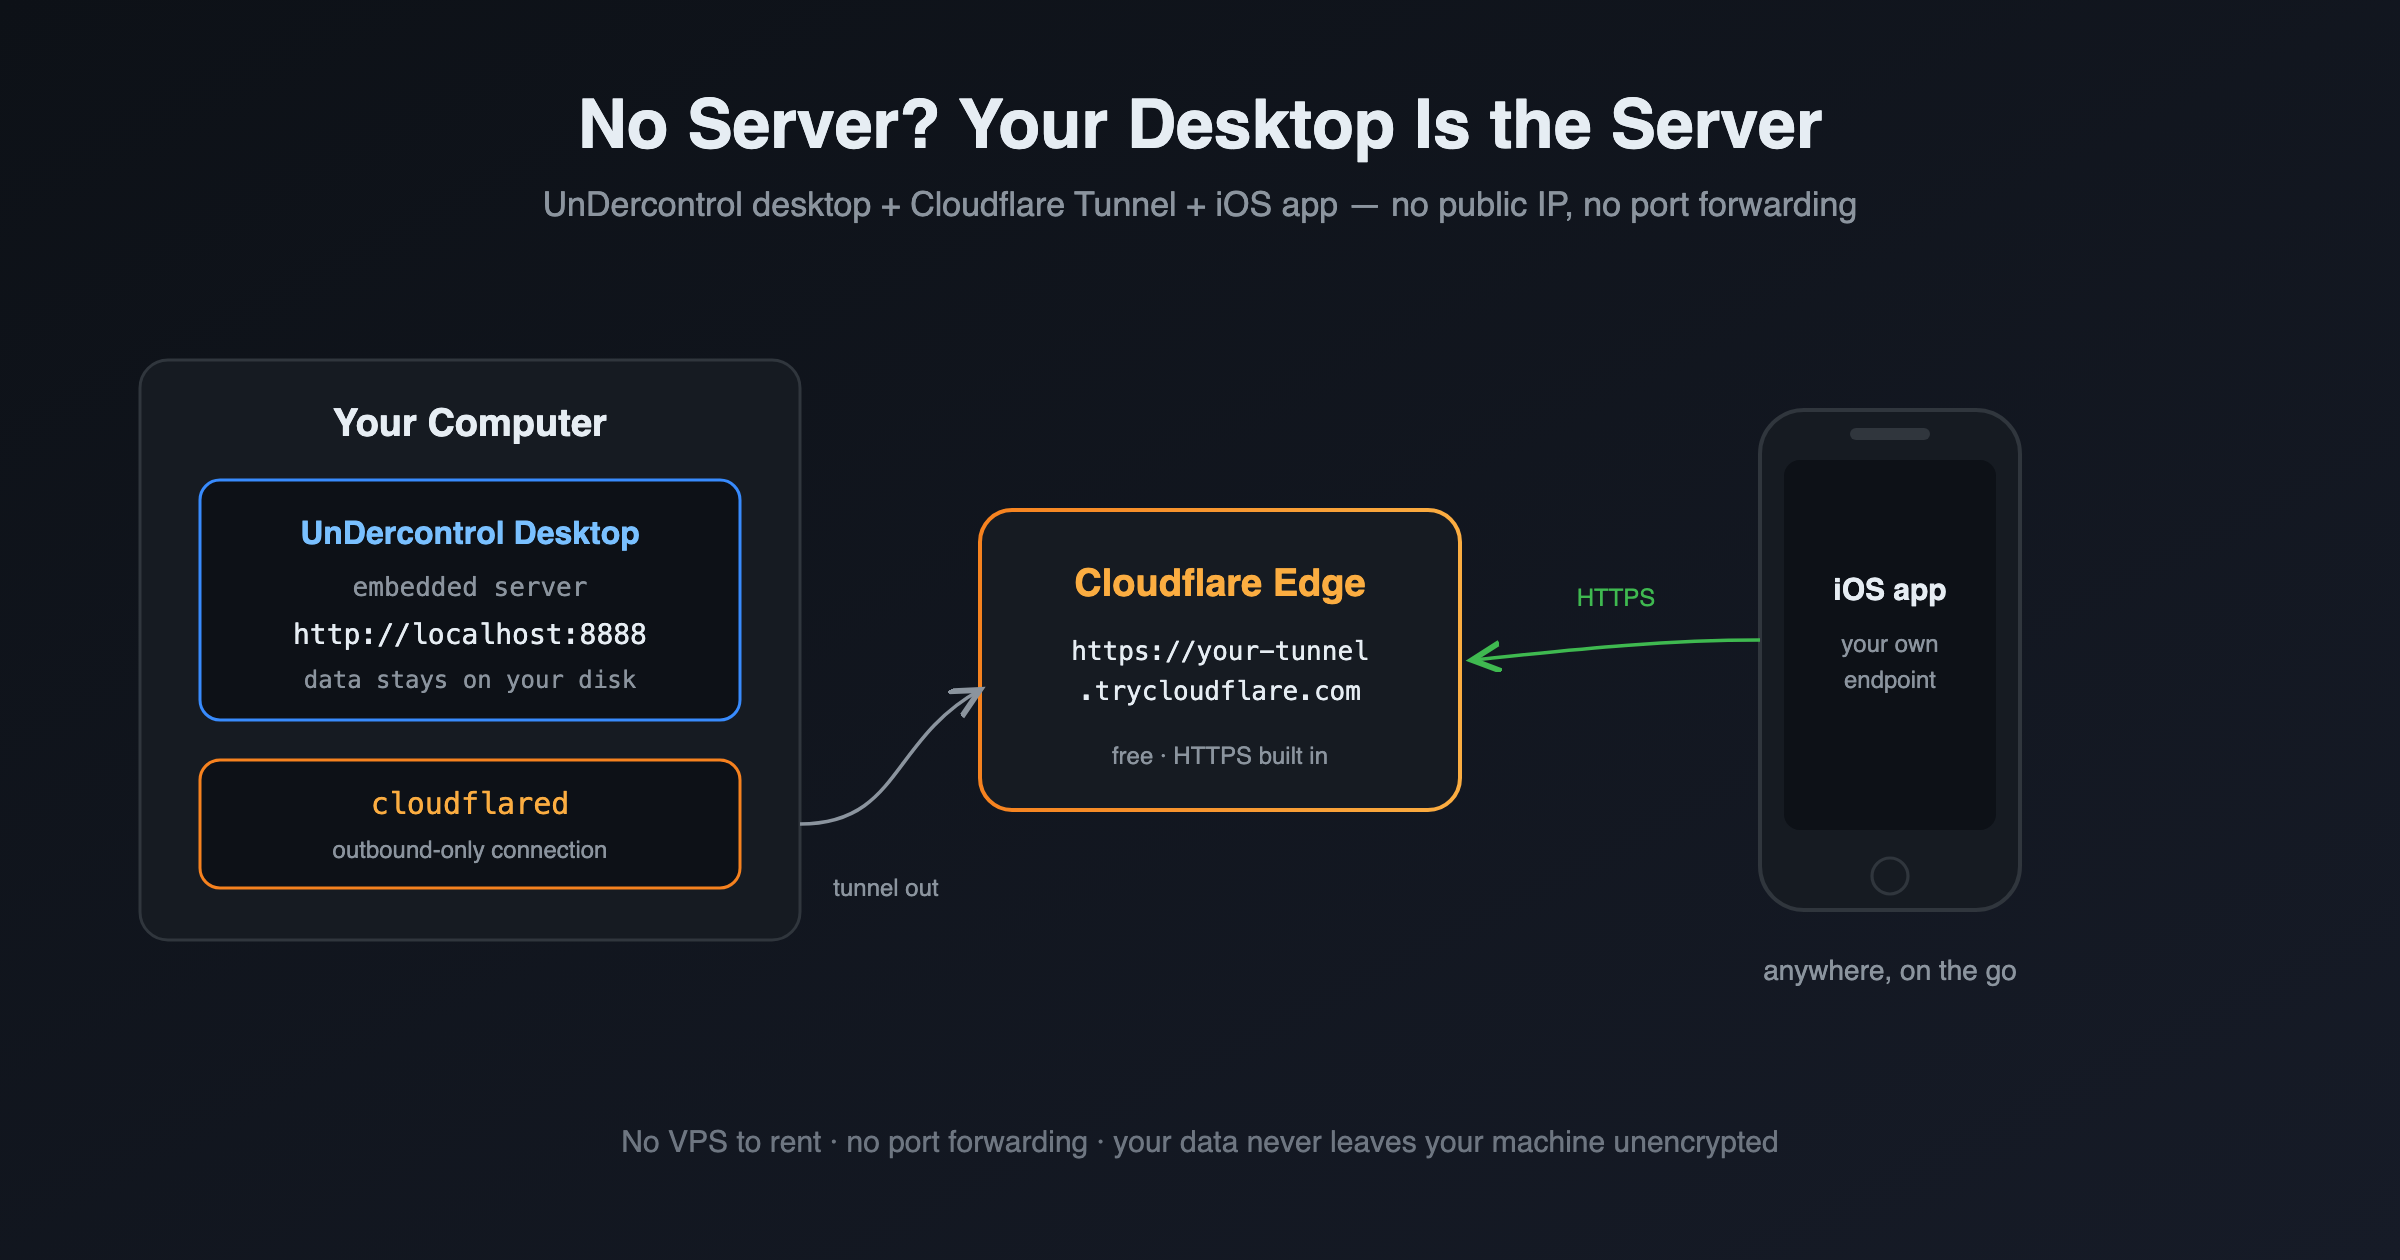
Step 1: Install the desktop app, meet the embedded server
Install the UnDercontrol desktop app (macOS / Windows / Linux) from the download page. It is not a web-page shell: a complete Go backend ships inside, and the moment the app starts, a local server is listening on port 8888 (it moves to the next free port if 8888 is taken), storing data as a SQLite file on your own disk.
On first launch you will see "Welcome to UnDercontrol" and a Start button. One click and you are in: the app auto-creates a local account personal@undercontrol.local with the default password personal123, no registration, no invite code. Remember these credentials, you will need them on the phone in step 4. And change the default password before exposing anything to the internet; the Security section below shows how.
Confirm the server is alive:
curl http://localhost:8888/health
# {"service":"ud-go-production","status":"healthy"}
If you see healthy, your "server" is ready. It is the computer you are using right now.
Step 2: One command to reach the internet
Cloudflare Tunnel works by reverse connection: cloudflared on your computer dials out to Cloudflare's edge, and outside traffic is relayed back through that connection. Because the connection is outbound, you need no public IP and never touch your router settings.
Install cloudflared:
# macOS
brew install cloudflared

# Windows
winget install Cloudflare.cloudflared

# Linux (Debian/Ubuntu): add the repo from https://pkg.cloudflare.com first
sudo apt install cloudflared
Then one command:
cloudflared tunnel --url http://localhost:8888
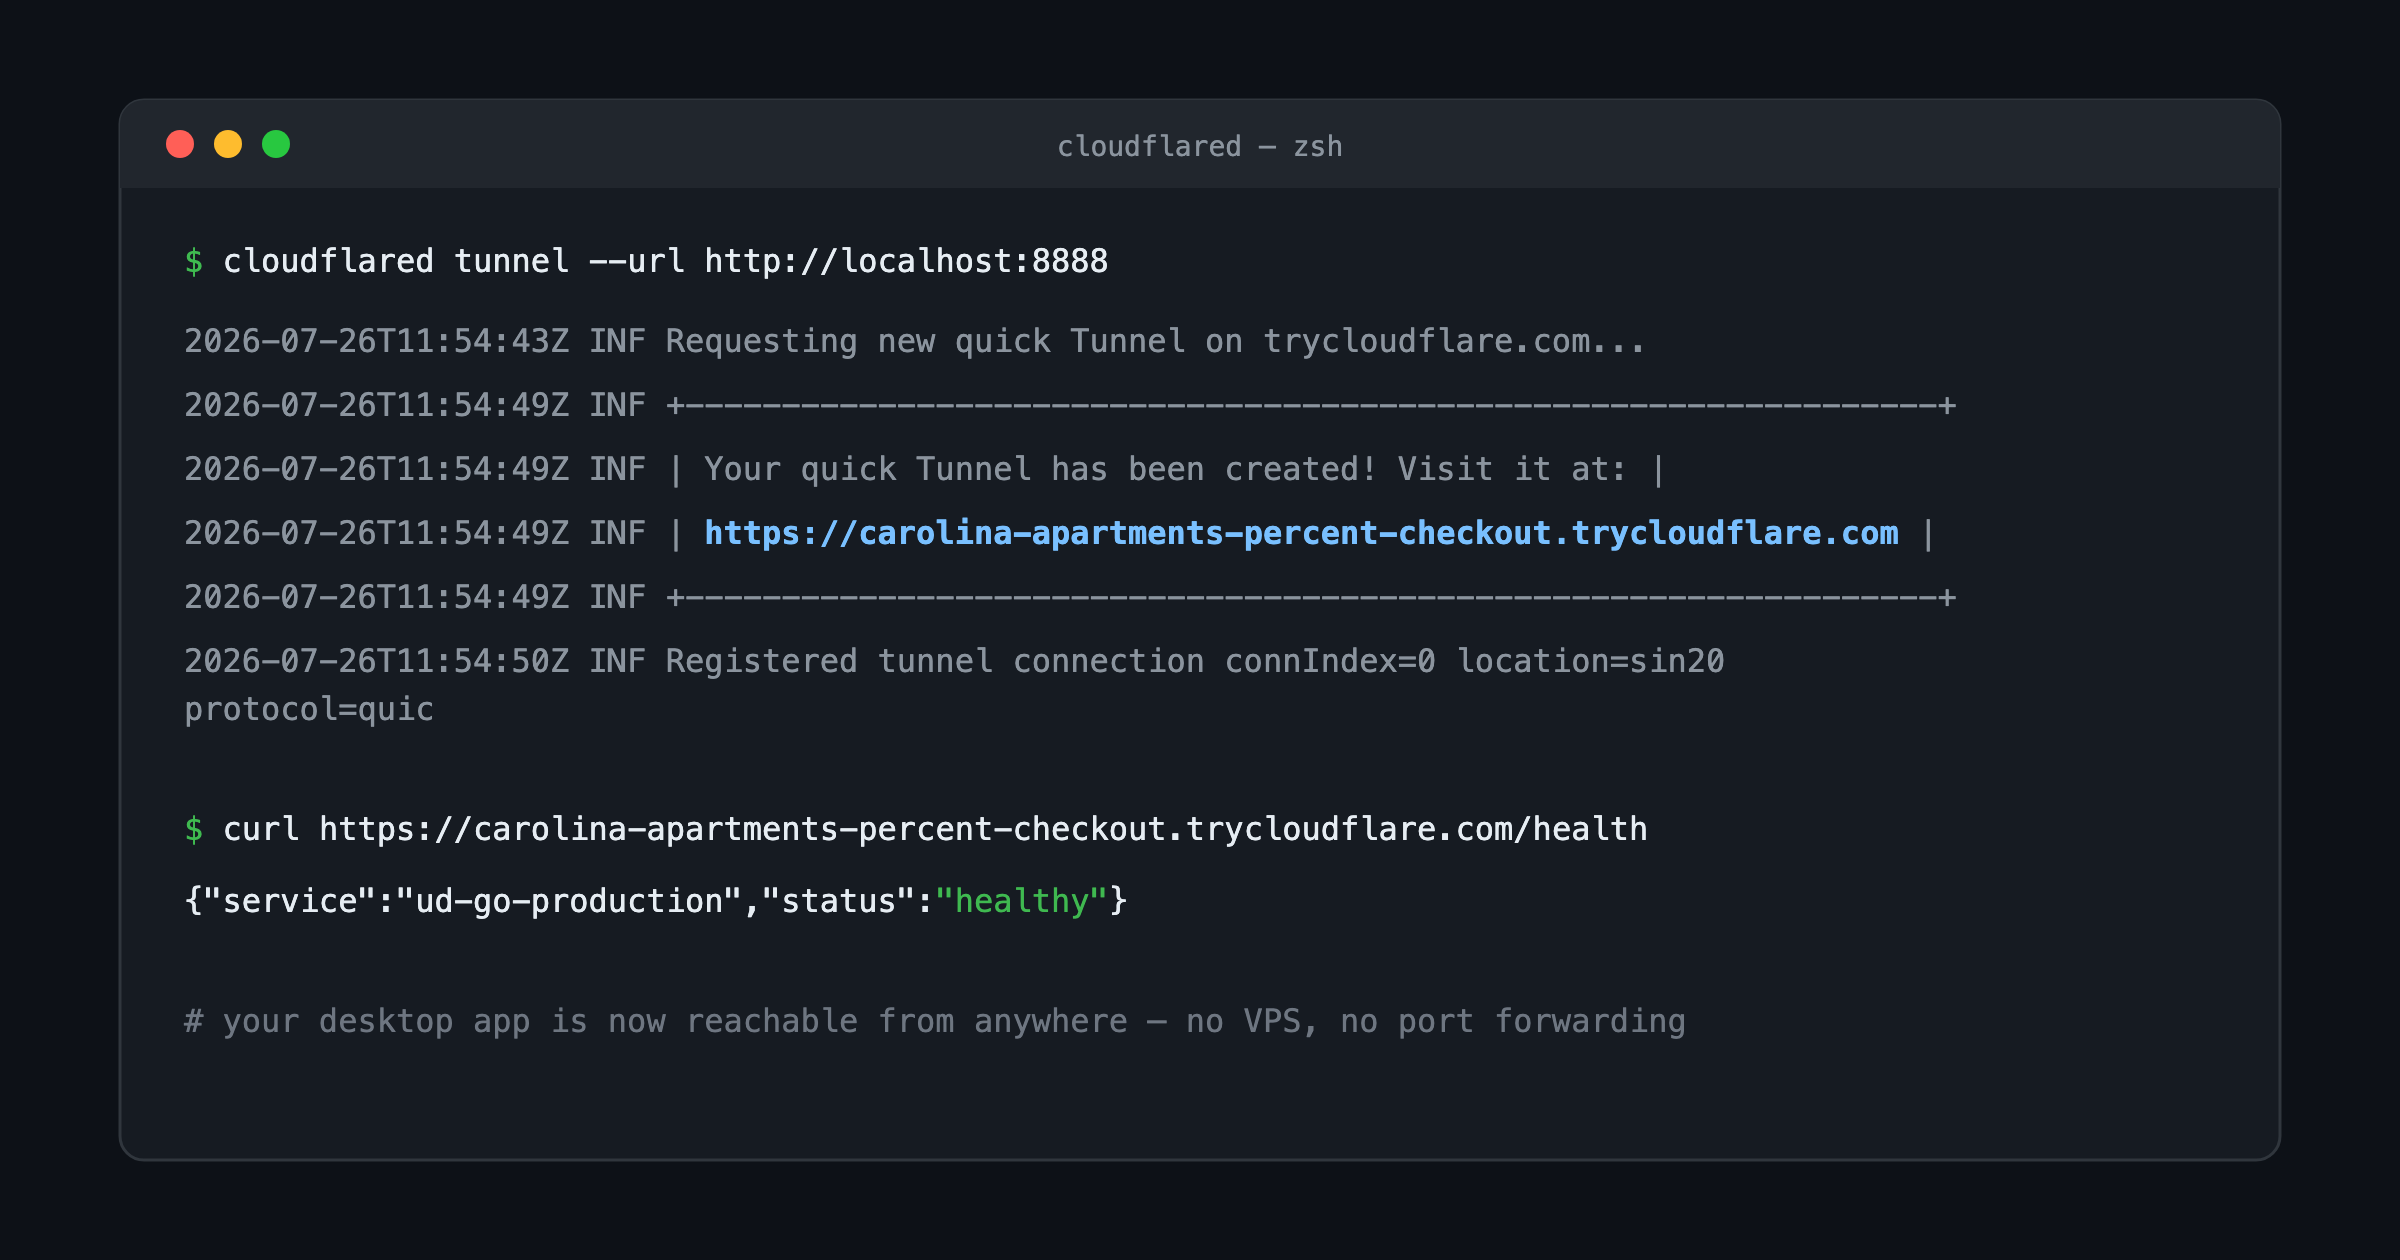
A few seconds later the terminal prints a random https://xxx.trycloudflare.com address: your public endpoint, HTTPS included, no Cloudflare account required. Verify from your phone (turn off Wi-Fi so you are on cellular, which proves the path is really public): open https://xxx.trycloudflare.com/health in the browser. healthy means the whole chain works.
Quick tunnels are for trying the flow out: the address changes every time you restart cloudflared, and Cloudflare makes no uptime promise for them. For daily use, spend five minutes upgrading to a named tunnel.
Step 3 (recommended): A named tunnel with a fixed address
A named tunnel needs a free Cloudflare account and a domain hosted on Cloudflare. The domain costs a few dollars a year and is the only place money can enter this setup.
# 1. Log in; authorize your domain in the browser
cloudflared tunnel login

# 2. Create the tunnel
cloudflared tunnel create ud

# 3. Point a subdomain at it
cloudflared tunnel route dns ud ud.example.com
Write a config file at ~/.cloudflared/config.yml:
tunnel: ud
credentials-file: /Users/you/.cloudflared/<tunnel-id>.json

ingress:
  - hostname: ud.example.com
    service: http://localhost:8888
  - service: http_status:404
Run it, then register it as a system service so it survives reboots:
cloudflared tunnel run ud        # run manually first
sudo cloudflared service install # then install as a service
From now on https://ud.example.com is your fixed endpoint. Remember to stop the computer from sleeping in the system power settings — it is your server now.
Step 4: Point the iOS app at your endpoint
The iOS app is in public beta on TestFlight (install TestFlight from the App Store first).
Open the app. At the bottom of the sign-in screen there is an API server section showing the current server. Tap Change and enter your public address, including the /api/v1 suffix:
https://xxx.trycloudflare.com/api/v1
The status dot probes as you type: when it turns green with connected · Personal, your phone has reached the server on your computer. Tap Save, then sign in with the account from step 1: personal@undercontrol.local and your password.
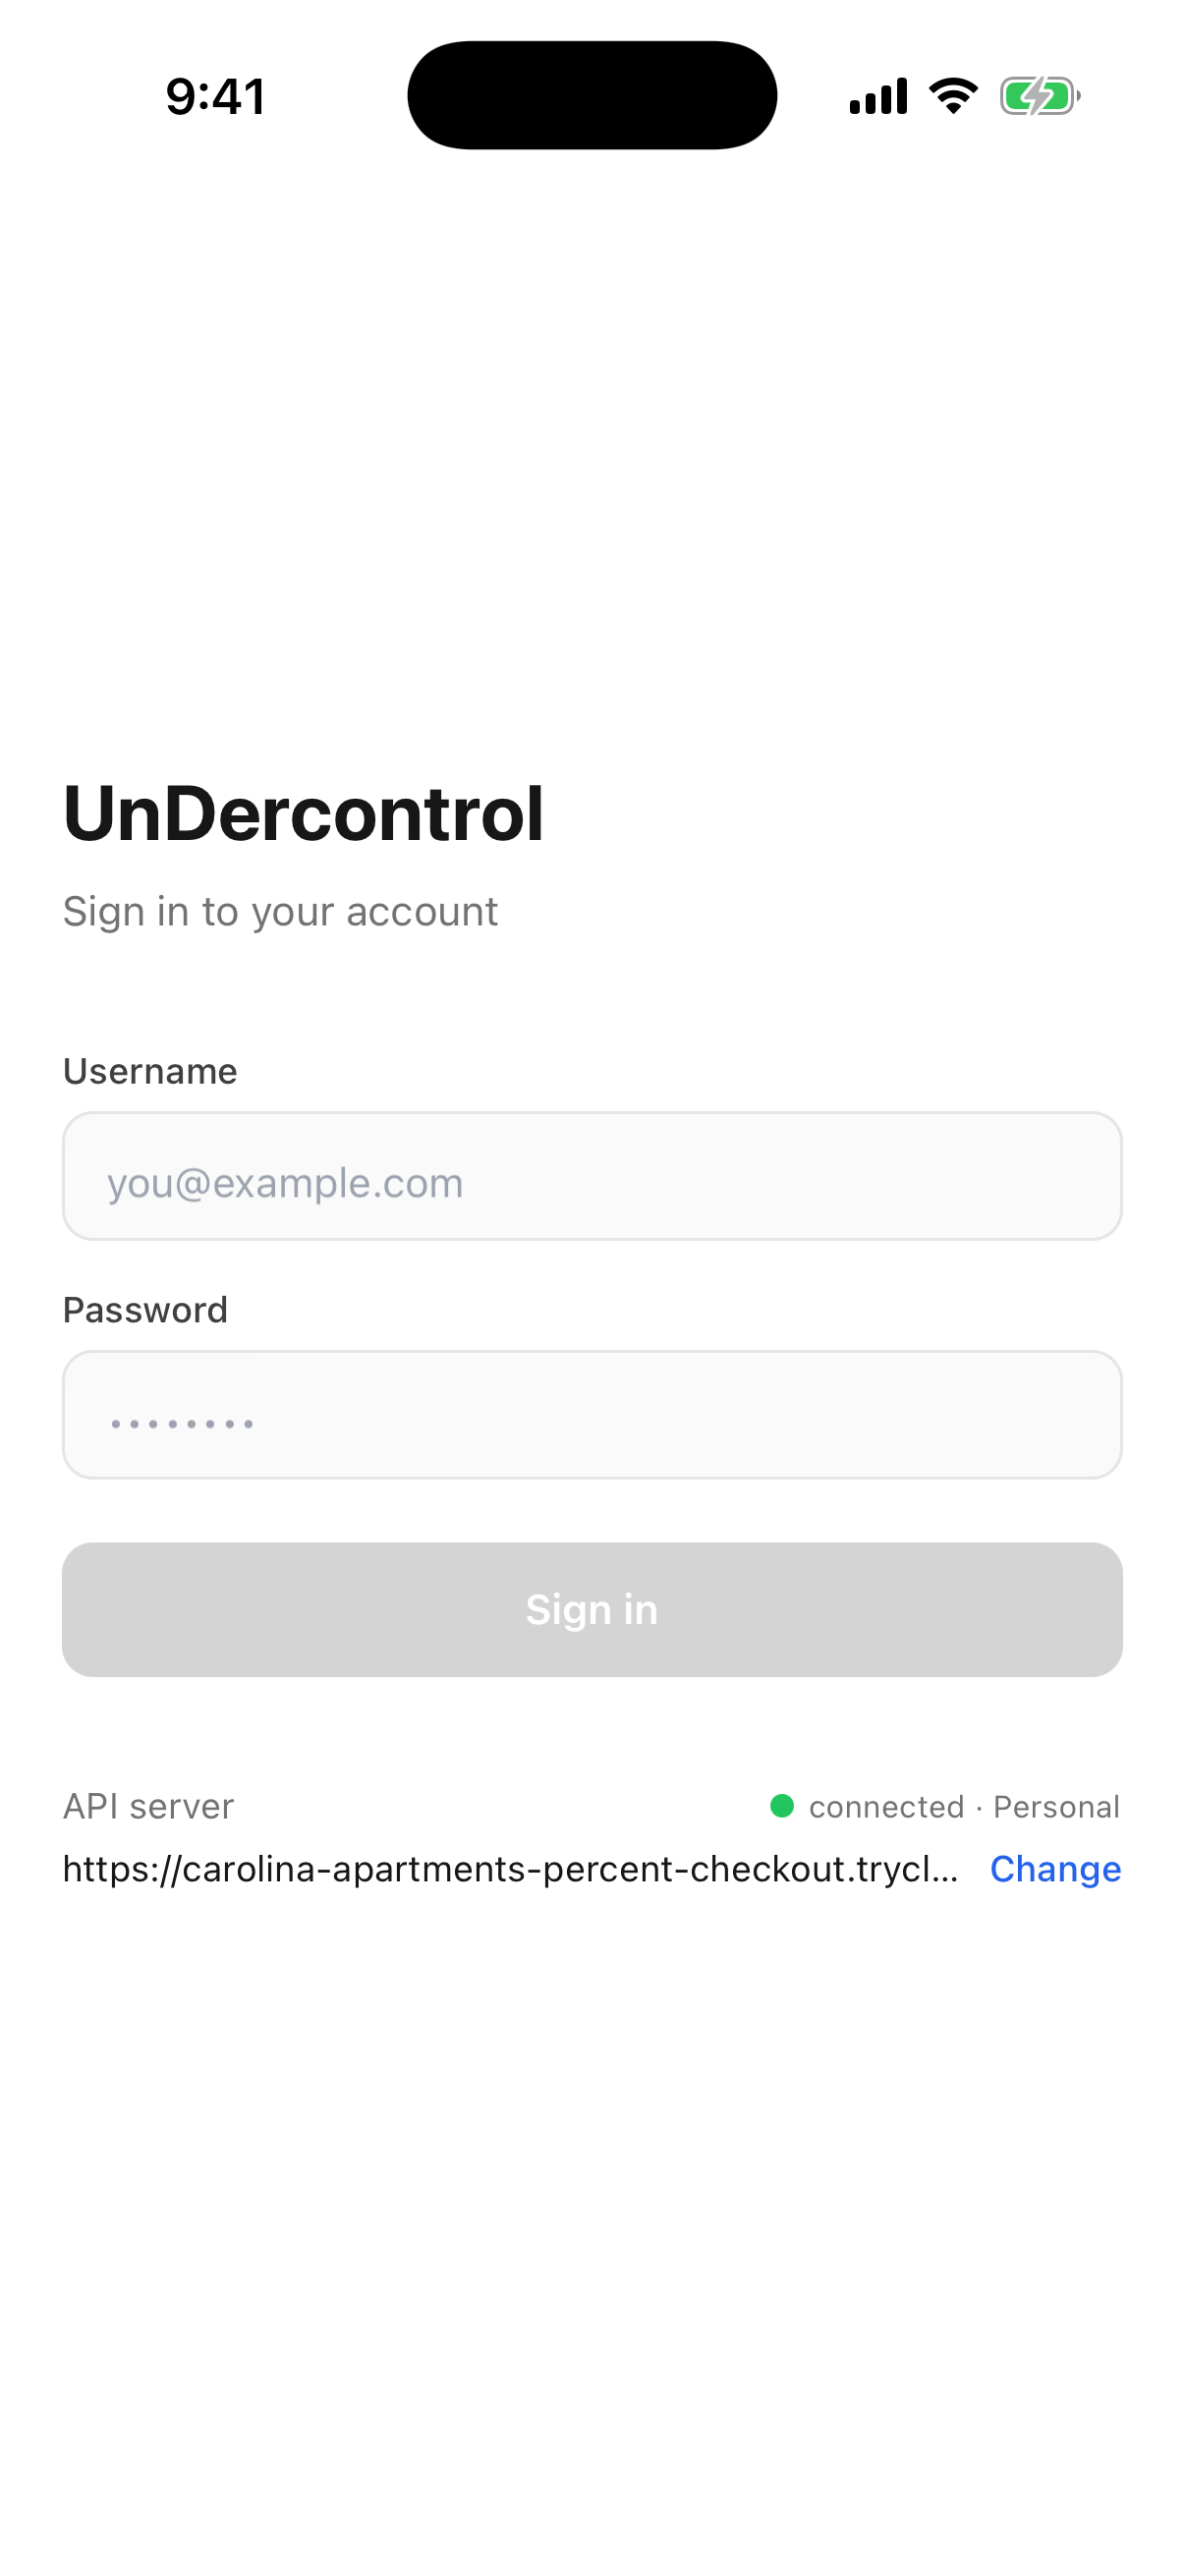
What you see on the phone is the data on your computer: tasks, notes, ledgers. Edit on the phone and the desktop has it.
One detail: iOS requires HTTPS for public domains (Cloudflare Tunnel provides it, nothing to do). If you enter a LAN or private-mesh IP instead, write http:// explicitly; without a scheme the app assumes https://.
Security
Public exposure means anyone with the URL can reach your endpoint. Three things, in order of importance:
1. Change the default password first. Every data endpoint requires login, but the desktop's default password personal123 is public knowledge. Exposing it unchanged is taping the key to the door. The password comes from the PERSONAL_TIER_PASSWORD environment variable; on macOS, launch from a terminal with it set:
PERSONAL_TIER_PASSWORD='your-strong-password' /Applications/UnderControl.app/Contents/MacOS/UnderControl
On Windows, add PERSONAL_TIER_PASSWORD in System Environment Variables and restart the app. Phone and CLI then log in with the new password.
2. A random URL is not a security mechanism. The trycloudflare address is hard to guess, but do not treat that as protection; think before sharing the link.
3. For an extra gate, Cloudflare Access on the free plan can put an email-code check in front of a named tunnel. Configure it once and it applies to every device.
Don't want public exposure at all?
If all you need is "my devices can reach each other", skip the public internet entirely: use a private mesh network tool to put your phone and computer on the same virtual LAN. Install the client on each device and they see each other; your computer gets a virtual-LAN IP, and the iOS app endpoint becomes http://<virtual-lan-ip>:8888/api/v1 (write http:// explicitly). Zero public exposure, and the free tiers of these tools are usually plenty for personal use. The mesh setup itself is out of scope here; every vendor's docs cover the phone-plus-computer case.
After it works
The bill: VPS $0, tunnel $0, HTTPS certificate $0. The only optional cost is a domain at a few dollars a year.
- Desktop download: https://oatnil.com/download
- iOS TestFlight: https://testflight.apple.com/join/st2TnaBF